Getting Started
Download & Installation
1. Download
Grab the latest build from the Download page. Pinescape runs on PC or in PC-VR. VR requires a Meta Quest 3 headset.
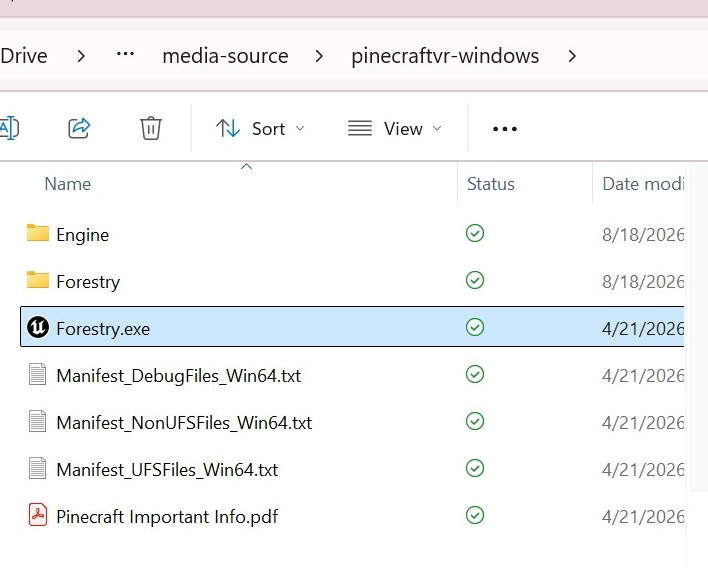
2. Unzip: there's no installer
Unzip the download anywhere on your computer and you're ready to go. Unzipped, it takes up about 885 MB.
3. Check system requirements
Take a look at the System Requirements on the Download page to make sure your PC can run it before diving in.
4. First launch: Windows SmartScreen warning
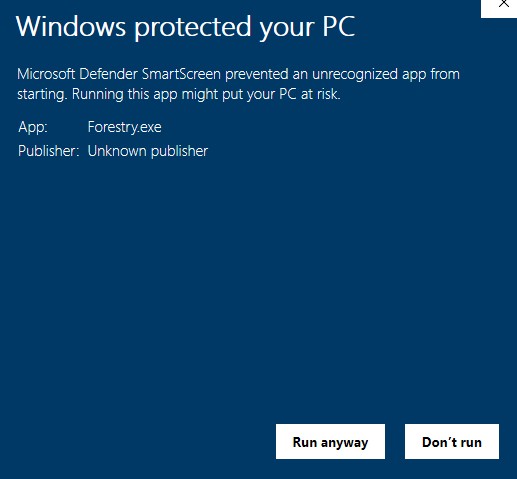
The first time you run Forestry.exe, Windows will likely show a blue "Windows protected your PC" screen. This is normal, it just means the app isn't yet signed with a recognized publisher certificate. Click More info, then Run anyway to continue.
Setting Up: PC
There's not much setup here, just double-click Forestry.exe in the folder you unzipped, and you're in. Here's what you need to know to get around once you are:
Controls
- WASD: move
- Mouse: look around
- Left Shift: sprint
- Space: jump (though you won't really need it)
- Q: spray/mark/un-mark a tree. Aim at it and be within reach.
- E: inspect a tree, showing its height, diameter, and species (E again, or the Close button, to dismiss)
- R: open the overhead map (WASD pans it, mouse scroll wheel zooms)
- P: pause menu (P again, or the Close button, to dismiss)
Setting Up: VR
VR requires a Meta Quest 3.
Requirements
- Meta Quest 3
- An NVIDIA graphics card, driver version [driver version TBD] or later
- Meta Horizon Link installed on your PC
Setup
- Install Meta Horizon Link on your PC.
- Connect your Quest 3 to your PC with a USB-C cable.
- When prompted on your headset, select the option to connect to your PC (usually shown as "Quest Link" or similar).
- Use the controller trigger to launch Pinescape from your PC's app list, inside the headset.
VR Controls
- Left joystick, forward: teleport move
- Left joystick, left/right: snap-turn 45°
- Left grip: bring up the tablet device
- Left X/Y buttons: zoom the overhead map in/out
- Left trigger (tablet up): enable the pointer laser, which also lets you:
- Right A button: click/select on the tablet screen
- Right joystick: move the overhead map, while pointing at the tablet
- Right trigger: inspect a tree (point the laser at it; results show on the tablet)
- Right grip: enable the spray can
- Right trigger (spray can enabled): spray/mark/un-mark a tree
Loading Custom Maps
- Clicking "Start Session" loads the built-in map by default, but you can also build your own.
- Use our Stand Generator to create a natural (random) or planted (grid) map.
- Download your map. It comes as a CSV file.
- Place the CSV into the
SavedData/Localfolder inside your Pinescape install directory. - Choose "Load Session" in-game. It loads the first CSV alphabetically in that folder, so keep just one stand in there at a time.
Tips & Troubleshooting
- Ghosting/trailing behind moving objects in VR? That's the Quest 3's Auto-Frame Generation. Turn it off with Ctrl + Numpad 1 while Pinescape is open. It has to be the 1 on the numpad, not the number row.
- You don't need to close Pinescape to swap CSVs between folders. Files are only read when you click Start Session or Load Session, so it's safe to do while the game is running.
- The overhead map pans faster the further you're zoomed out, handy for covering a large stand quickly.
- If a CSV is missing height, diameter, or "alive" data for a tree, that tree generates as dead.
- A tree showing 0.0 m for height in the inspection window is a dead "snag" tree, shown as dead.
- Grass-stage trees are visual only, not interactable.
- Saplings are interactable, but tend to sit close together, sometimes almost overlapping, which can make them tricky to mark or inspect individually.